|   Home   |   The Studio    |   Studio Stories    |   Pilates Press    |   Health & Wellness    |   Nutrition   |

Sunday, 8 April 2018

HEALTHY ANZAC BISCUITS


Anzac biscuits are delicious but are usually filled with golden syrup as well as other types of sugar and tonnes of butter and oats, which means coeliacs or gluten intolerant people have to stay away from them. This recipe has reduced sugar, butter and uses quinoa flakes. It is also dairy free! 

Ingredients

·      Baking paper
·      1 ½ cups quinoa flakes
·      ½ cup shredded coconut
·      ½ cup roughly chopped unsalted nuts (I used pistachios and almonds, however you could also use macadamia nuts, cashews, brazil nuts, hazelnuts, etc.).
·      ¼ cup natural maple syrup
·      1 teaspoon vanilla extract
·      50g Nutalex, melted
·      1 egg
·      Pinch of sea salt

Method

1. Preheat a fan forced oven to 180 degrees Celsius. Line a baking tray with baking paper.

2. Combine all the ingredients in a large mixing bowl and stir well to combine. (If the mixture is a little dry pour water into a mug and wet your hands before rolling each ball). Roll the mixture into small balls (about the size of a heaped tablespoon) and place them on the tray a few centimetres apart. Pat the biscuits down gently with your hand.

3. Bake in the oven for around 25 minutes or until the biscuits are golden. Remove from the oven and leave to cool.

Makes / 15-16 biscuits
Serving size / 1 biscuit
Total Prep & Cooking time / 40 minutes

Sunday, 25 September 2016

SWEET CHILLI PORK OR TOFU NOODLES


I'm a big fan of noodles, however I often find myself eating much more than a proper serving size! I've tried to trick myself with the below recipe by using pork or tofu and vegetables to fill my plate and less noodles. I was pleasantly surprised that this did work! These is a really simple lunch or dinner that requires minimal ingredients and fuss. Don't be fooled by the steps - it's an easy recipe! You can use any type of vegetable here that you like; Asian vegetables like buk choy or pak choy would work, as would zucchini and/or Chinese cabbage. I personally just love pumpkin and broccoli together, maybe because of how bright my plate looks. If gluten-free substitute the egg noodles for rice vermicelli or stick noodles. 

INGREDIENTS


  • 350g lean pork fillers, fat removed or firm tofu
  • 100g egg noodles
  • 500g pumpkin, peeled, deseeded and cut into 3cm pieces
  • 1 large head of broccoli, stalk and florets chopped in even sized pieces
  • 2 teaspoons sesame oil 
  • 1/4 cup sweet chilli sauce (plus 1 tablespoon extra if using pork)
  • 2 spring onions, finely chopped
  • Optional - 1/2 cup fresh coriander leaves, roughly chopped


COOKING 

1. If using pork - Toss the pork in a medium bowl with 1 tablespoon sweet chilli sauce and leave to marinate in the fridge for at least 10 minutes. 

1. If using tofu - Place the tofu between two chopping boards or plates with a weight on top (I used a jar of nuts). Raise one end (I placed a small scale underneath one side of the chopping board) and sit for 20 minutes to drain. Once drained, cut into even thin strips. 

2. Whilst step 1 is in progress, bring a medium saucepan filled halfway with water to the boil. Add the noodles and cook, stirring occasionally to break up the noodles, until they are tender. Remove from the heat and drain under cold water. 

3. Whilst step 2 is in progress, bring a large saucepan filled halfway with water to the boil. Once boiled add the pumpkin to the water and leave to steam for 8 minutes, before adding the broccoli and leaving to steam for another 3 minutes. Remove the vegetables from the stove and drain in a colander under cold water. 

4. If using pork - in a medium pan over medium heat (could reuse the saucepan from step 2), heat 2 teaspoons of sesame oil and swirl to coat. Cook the pork fillets for 4 minutes each side, then remove from the pan and leave to rest for a few minutes. 

4. If using tofu - in a medium pan over medium heat (could reuse the saucepan from step 2), heat 1/2 a teaspoon of sesame oil and swirl to coat. Finely slice the drained tofu, then cook each slice for 2-3 minutes on each side. Remove from heat and place on a plate to rest. Continue to repeat this process with another 1/2 teaspoon of oil until all the tofu pieces are cooked. 

5. Over low heat, return the large saucepan to the stove. Add the cooked noodles, cooked pumpkin & broccoli, cooked pork or tofu, spring onions and sweet chilli sauce and stir gently to combine, taking care not to mush the pumpkin. 

Divide into four bowls and serve warm, with coriander on top if desired. 

Serves / 4 
Total Prep & Cooking time / maximum 40 minutes 


x Premium Pilates Studio 

Saturday, 9 July 2016

HOMEMADE MUESLI


I love the fact that I can throw together whatever I have in the pantry onto a baking tray and call it 'Homemade Muesli'! This recipe is actually the result of several attempts at making my own granola and muesli and is very easily adaptable to whatever ingredients you have on hand. I initially started making granola, but I found that I was using too much coconut oil and sugary syrup (that is, rice malt syrup, maple syrup or honey) to make the ingredients stick together. Instead this recipe formed more of a muesli style so that I could omit the extra sugar and oil. The result: a simple, wholesome, low in sugar breakfast. The recipe below makes around 6 cups and I eat about 3/4 of a cup each morning for my breakfast with unsweetened almond milk.

The ingredients low down: I've given alternative options wherever possible. Quinoa flakes are rather expensive, however if you are coeliac or gluten intolerant you may not be able to stomach oats. I love adding corn flakes as it adds more 'beef' to the muesli, but you can add whatever unsweetened cereal you wish, such as rice bran, rice bubbles, more oats. I always add a combination of sunflower and pumpkin seeds. Shredded coconut does work better, but if all you have on hand is fine desiccated coconut that works too. Never add the goji berries, chia seeds or dried fruit before baking as a lot of their nutrients are lost in the baking process; instead add them at the end.

INGREDIENTS
  • oil spray 
  • 1 1/2 cups mixed nuts, roughly chopped (I use a combination of almonds, walnuts, peanuts and cashews)
  • 1 cup quinoa flakes or oats 
  • 3 cups unsweetened corn flakes or unsweetened cereal of your choice
  • 1/2 cup sunflower seeds and/or pumpkin seeds (pepitas)
  • 1 cup shredded or desiccated coconut 
  • 1/2 cup goji berries
  • 1/4 cup chia seeds
  • 1/2 dried fruit, ie sultanas & cranberries or fresh fruit to serve 
  • milk of your choice to serve - reduced fat cow's milk is best, but if you are dairy intolerant or allergic try unsweetened almond, oat, lactose-free or rice milk. 

METHOD

1. Preheat a fan-force oven to 200 degrees celsius. Line a large baking tray with baking paper and lightly spray with oil. 

2. Combine the nuts, flakes or oats, unsweetened cereal, seeds and coconut in a large bowl and stir well to mix. Evenly spread the muesli out in a single layer on the prepared tray. Bake for 15 minutes or until the nuts are golden and coconut are golden. 

3. Remove from the oven and let the muesli cook slightly before adding the goji berries, chia seeds and dried fruit, if using. If using fresh fruit do not add until you add the milk. Store in an airtight container for several months. 

Makes 6 cups / around 6 - 10 servings 
Total Prep & Cooking time / 20 minutes 

x Premium Pilates Studio

Monday, 11 April 2016

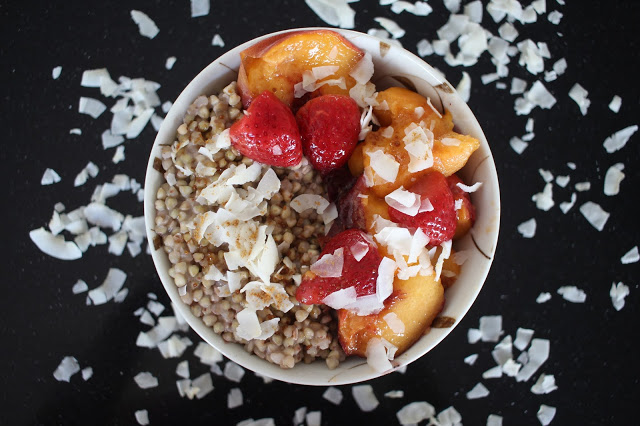
BUCKWHEAT PORRIDGE


I love oat porridge, however my body does not always like it early in the morning. As a result of this I've had to investigate alternative ways to make porridge, because going a winter without porridge is NOT an option. Hence I've been fooling around in my kitchen and have make a couple very tasty gluten-free porridge recipes. Below is my buckwheat porridge recipe; super simple and actually does not contain wheat, despite its name. Buckwheat surprisingly is a fruit seed that is related to rhubarb and sorrel (a type of spinach) and is therefore an excellent substitute for gluten-intolerant people. It has a rich, nutty flavour and can be used for a variety of recipes for example; buckwheat groats as I use in the recipe below can be used to make porridge, they can be a wholesome addition to soup, buckwheat flour is often used to make pancakes & crepes and soba noodles are made from buckwheat flour and wheat flour.
As there are numerous new 'superfoods' appearing in our faces everyday, I wanted to do my research on what makes buckwheat so special. Here are some of the nutritional benefits that I discovered about this little seed:

- It is very high in protein (second highest only to oats),
- It is rich in polyunsaturated essential fatty acids,
- Contains a high amount of soluble fibre,
- It is a great source of vitamin B1, C & E,
- Comprises of higher levels of manganese, copper & zinc than other cereal grains,
- It is loaded with carbohydrates (the good kind!),
- It contains rutin, a bioflavanoid with several antioxidant properties, including the controlling of blood pressure. 
and it is gluten-free (as mentioned above)


INGREDIENTS

  • 1/2 cup raw buckwheat groats / kernels, available at good supermarkets and health food stores.
  • 1 1/2 cups water 
  • 1/4 reduced-fat cows milk (or substitute for unsweetened almond milk, lactose-free milk, etc), plus extra, to serve
  • a small handful of chopped fresh fruit (I used peaches and strawberries)
  • 1 teaspoon of natural sweetener, such as organic honey or maple syrup, coconut sugar, stevia, etc. 
  • Optional- toppings, such as coconut flakes, chia seeds, goji berries. 

COOKING 

1. Bring the buckwheat groats and the water to the boil in a medium saucepan, covered. Once boiled, remove the lid and lower to a simmer, stirring frequently, for 8-10 minutes or until the water has been absorbed. 

2. Add the 1/4 cup milk to the pan and stir for 1-2 minutes or until all combined. Remove from the stove and add another 1/4 cup of milk, if desired. Add your fresh fruit, natural sweetener and topping/s, if using, and stir well to combine. 

Divide into 2 bowls and serve warm. 

Serves / 2 
Total Prep & Cooking time / under 20 minutes 

x Premium Pilates Studio 


Information from http://www.glnc.org.au/grains/types-of-grains/buckwheat/

Sunday, 27 March 2016

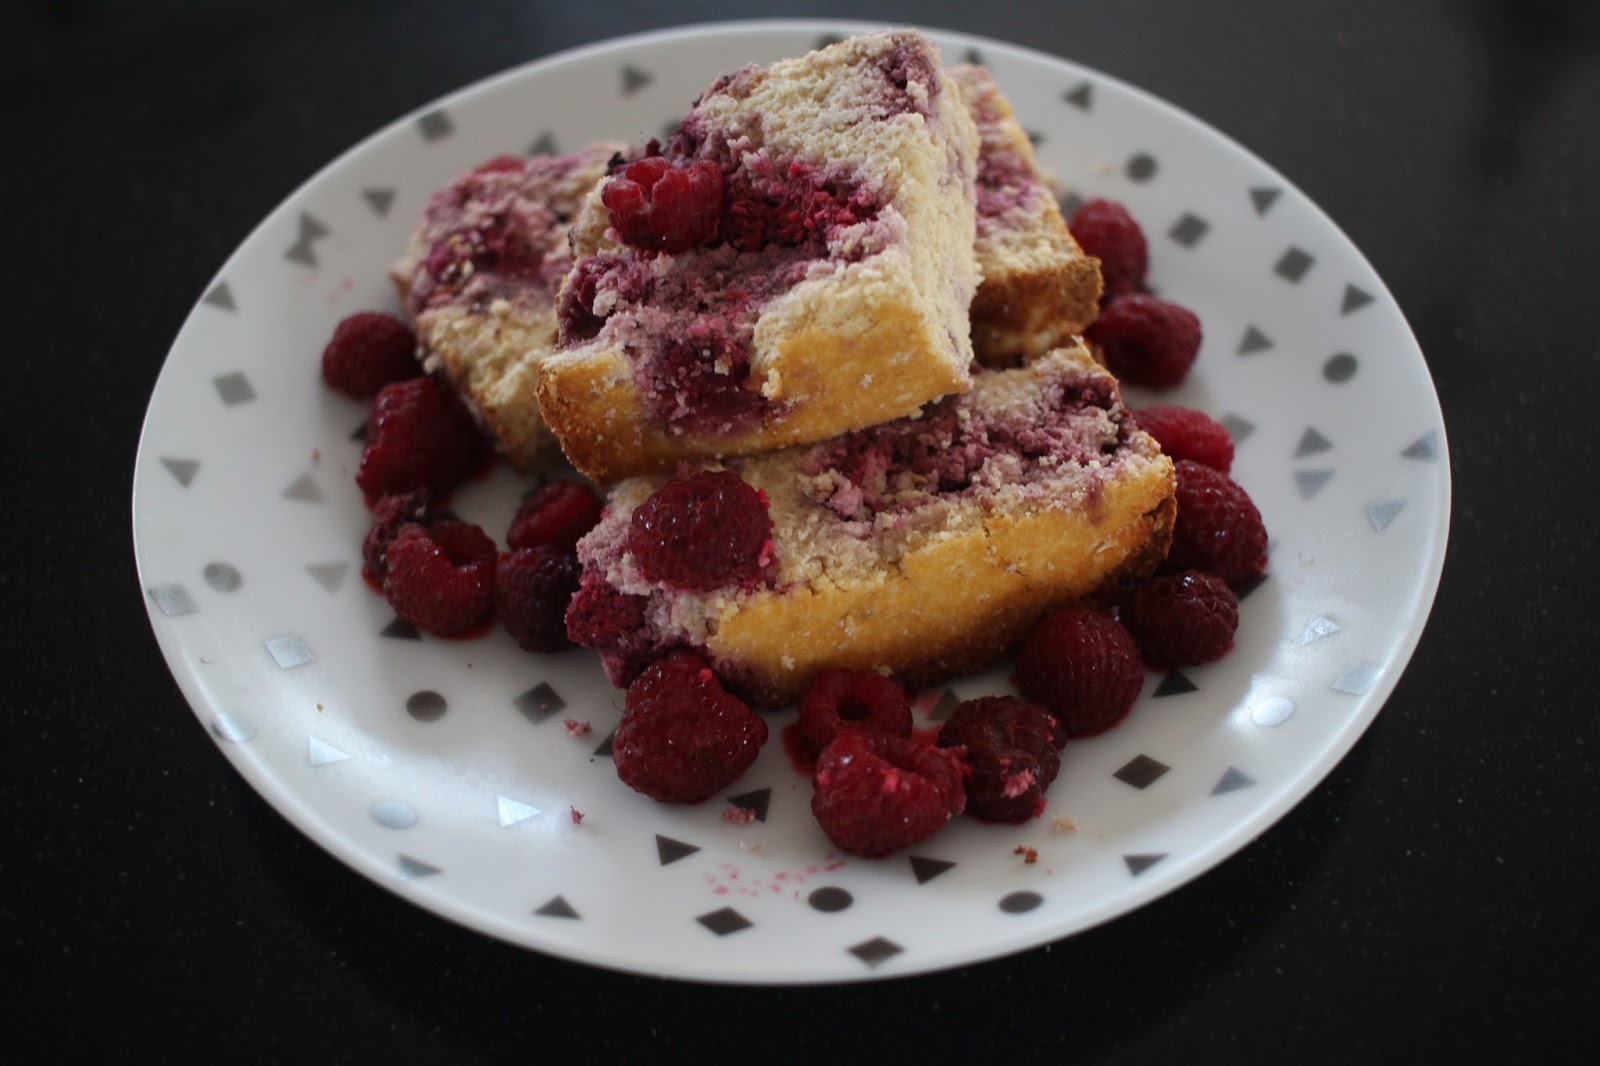
COCONUT & RASPBERRY SQUARES


This delicious yet healthier version of a treat has been adapted from a recipe I found in a rather old edition of a Woolworths Fresh magazine. I have been cleaning out my office and trying to de-clutter my life when I found this gem. I have adapted the original to make my version healthier as well as gluten and dairy free. My only issue with this sweet treat is how incredibly moreish it is!

INGREDIENTS

  • baking paper
  • 1 cup coconut flour
  • 1 teaspoon baking powder (gluten-free if intolerant or allergic)
  • 1/2 cup desiccated coconut
  • the juice and zest of 1 medium lemon
  • 4 eggs, preferably free range
  • 1 1/2 cup unsweetened almond milk (or reduced fat cows milk if not intolerant or allergic to dairy)
  • 2 tablespoons coconut oil, plus extra, to grease
  • 1 teaspoon vanilla extract 
  • 3 tablespoons natural maple syrup
  • 1 heaped cup frozen raspberries 

BAKING 

1. Remove the 1 cup of frozen raspberries from the freezer and leave to thaw. 

2. Preheat a fan forced oven to 190 degrees celsius. Line a 'loaf' tin with a diameter around 27cm x 14 cm with baking paper and grease lightly with coconut oil. 

3. Combine the dry ingredients: the flour, baking powder, desiccated coconut and zest of the lemon in a mixing bowl. Stir well to combine. 

4. In a separate mixing bowl, pour in the wet ingredients: lemon juice, eggs, milk, oil, vanilla and maple syrup. Whisk well. 

5. Pour the wet ingredients in the dry ingredients and stir well. Do not worry if the mixture becomes quite thick as the coconut flour will absorb the liquid. Carefully fold in the raspberries. 

6. Spoon the mixture into the prepared baking tin and pat to even out the surface with a wet spatula. Bake for 50 minutes to 1 hour or until the loaf is cooked. (Use the skewer or knife test: at the 50 minute mark, insert a skewer / knife into the middle of the loaf. If the skewer / knife comes out sticky, the loaf needs to continue baking). 

7. Once cooked, remove the tin from the oven and leave to cool completely before cutting into squares. NB: as this loaf is basically only held together by coconut flour and eggs it is very fragile and will crumble easily. 

Total Prep time / 15 minutes 
Total Baking time / 50 minutes to 1 hour 


Saturday, 27 February 2016

GLUTEN-FREE CHOC-CHIP BANANA PANCAKES


Most Sunday mornings I make breakfast for myself and my husband, as we don't get a chance to eat breakfast together during the week (unless you count downing some cereal super quickly at 5am in separate rooms!) I try to be creative and make different types of pancakes most Sundays. A few Sundays ago I tried to make pancakes with no flour and just almond meal...they ended up being muffins as the pancakes wouldn't flip without breaking! I often do not get it right when I trying a recipe of my own and usually end up with a massive mess! However last Sunday I hit the nail on the head with these babies. You do not have to make them gluten-free or dairy-free if you do not want to; you can use regular flour and/or cows' milk. I just love how much flavour these pancakes have and how thick and tasty they are. Plus, eating chocolate for breakfast seems very naughty!

INGREDIENTS

  • 1 cup gluten-free self raising flour
  • 1 ripe medium banana, mashed
  • 1 heaped teaspoon ground cinnamon
  • 2 eggs, preferably free-range
  • a pinch of sea salt
  • 1/2 cup almond meal
  • 1/2 cup unsweetened almond milk (or whatever milk you choose)
  • 1 teaspoon gluten-free baking powder
  • 1/4 cup dark chocolate chips
  • 2 teaspoons extra virgin olive oil 
COOKING

1. Combine all the ingredients, except the oil, in a large mixing bowl and stir well. If the mixture is too dry for your liking, add a splash more milk at a time. As these are meant to be quite thick pancakes the mixture should not be runny. 

2. Add 1/2 teaspoon of oil to a medium frying pan over medium-low heat. Pour in 1/4 cup of batter and flip when little bubbles appear on the surface, around 3 minutes for the first pancake. Flip over and cook for 2 minutes on the other side, or until the pancake is golden-brown on both sides. Continue to cook each additional pancake for around 2 minutes each side. 

NOTE: as the pan can get hot very quickly, you may need to lower your heat down to a very low setting after cooking the first pancake so that the remaining do not burn. The mixture should make 6 quite large pancakes. You do not need maple syrup on top of these thick pancakes, however you can add sliced banana or some more dark choc chips! 

Makes / 6 large pancakes 
Serves / 3 - 4 
From Prep to Plate Cooking time / under 30 minutes 

x Premium Pilates Studio 


Sunday, 21 February 2016

PAPRIKA CHICKEN with COUSCOUS SALAD


The inspiration for this salad came from a Farro & Quinoa Chicken Salad I had on a Qantas flight a few weeks ago. Whilst farro is delicious and has many health benefits, it is not as easily accessible as couscous, hence the change. I have made many salads with quinoa and wanted to mix things up with couscous, however you could substitute 1 cup couscous for 1 cup quinoa (make sure to thoroughly rinse the quinoa before cooking under cold water using a sieve, then bring the quinoa and 2 cups water to the boil over high heat, covered. Once boiled simmer for around 10 minutes or until all water is absorbed. Turn off the heat and leave the quinoa in the pan, covered, for 5 minutes, before fluffing with a fork). Nigella seeds are hard to come by in supermarkets, so I have used sesame and poppy seeds as an alternate. If you wanted to make this salad vegetarian, omit the chicken and add 400-450g lightly pan fried tofu. 


INGREDIENTS

Salad

  • 500g chicken breast, preferably free-range, cut into even strips
  • 2 tablespoon extra virgin olive oil
  • 2 heaped teaspoons smoked paprika
  • 1 cup couscous or 1 cup quinoa (then substitute 1 cup water for 2 cups)
  • 1 cup water 
  • a dash of sea salt
  • 250g cherry tomatoes, halved or 1 large tomato, finely chopped 
  • 1/2 a continental cucumber, diced 
  • 2 generous handfuls of baby spinach, washed
  • 2 cups frozen peas, thawed

    Dressing
    • 1 tablespoon dijon mustard
    • 2 tablespoons apple cider vinegar
    • a generous sprinkle of ground black pepper
    • the juice of 1 lime
    • water 
    • 1 teaspoon sesame seeds & 1 teaspoon poppy seeds OR 2 teaspoons nigella seeds 

    COOKING

    1. Combine the chicken strips, 1 tablespoon oil and paprika in a medium bowl. Heat a grill plate or a large fry pan over medium high heat until warm, then add the chicken. Cook for around 5-6 minutes, turning the chicken pieces over after 2-3 minutes so that both sides of each strip are cooked. Turn off the stove and leave the chicken to rest for 5 minutes, then cut the largest strip in half to see if the chicken is cooked. (If the inside of the strip is white and no pink remains the chicken is cooked). 

    2. Meanwhile, cook the couscous by combining 1 cup water, 1 tablespoon oil and a dash of sea salt in a medium saucepan. Bring to the boil, covered, over medium-high heat, then remove from heat. Add the 1 cup couscous and stir vigorously until the ingredients are combined. Cover the pan and leave to stand for 2 minutes, then gently separate the grains with a fork. 

    3. Place the cooked chicken and couscous in a large serving bowl, then add the tomatoes and baby spinach. 

    4. Using the saucepan that the couscous was cooked in, fill it up one quarter of the way with water. Bring the water to the boil over high heat, covered, then add the peas and cook for 1 minute or until peas are tender but not mushy. Drain over cold running water, then add the peas to the salad. 

    5. Whilst the water is boiling in step 4, make the dressing by combining all the ingredients and a splash of water in a cup. Stir well to combine and add more water if you would like a thinner consistency. Pour the dressing over the salad and toss well. 

    Serves  / 4 
    Total Preparation time / 10 minutes 
    Total Cooking time / max 20 minutes 


    x Premium Pilates Studio 

    Sunday, 14 February 2016

    MEXICAN SWEET POTATO POCKETS


    This recipe was adapted from one I found in the 'Lookbook Cookbook', a very hip cookbook filled with Vegan & Gluten-free meals. This book was surprisingly given to me by my meat-loving husband for my birthday! I've adapted this recipe to include dairy in the form of feta cheese, however if you wanted to keep it lactose-free and / or vegan, substitute the cheese for 1 medium avocado. Remember that whilst avocados are incredibly amazing, they do contain a lot of fat, so you have a bit of a Sophie's choice decision on hand: either avocado or feta cheese! Or perhaps half half! 


    INGREDIENTS
    • 2 large sweet potatoes, cut into eight even pieces or 4 medium sweet potato, each cut in half, washed and dried (need around 1.2 kilo of sweet potato)
    • 2-3 tablespoons extra virgin olive oil 
    • 1/4 of a large red onion, finely chopped 
    • 1 x 400g tin of four or five bean mix, drained & rinsed
    • 150g green or red capsicum or a mixture of both, diced
    • 2 spring onions, finely chopped, plus extra to serve 
    • 100g reduced-fat feta, crumbled or finely diced
    • 1/4 - 1 teaspoon dried chilli flakes
    • 1 teaspoon smoked paprika
    • 1 large tomato, diced
    • the juice of 1 lime 

    COOKING 

    1. Preheat oven to 200 degrees celsius. Line a large baking tray with baking paper. Using a knife poke several holes into each piece of sweet potato (this will speed up the roasting process). Lightly brush the whole of each piece of potato with olive oil. Roast in the oven for 40-45 minutes or until the potato pieces are tender. 

    2. Meanwhile, make the potato pocket filling. As the potato takes a while to cook, use this time to cut and prepare all the vegetables. Then combine the onion, beans, capsicum, 1 spring onion, feta,  chilli, paprika, tomato, lime juice and a generous sprinkle of ground black pepper. Stir well to combine and place in the fridge to marinate. NB: if you are using avocado do not add to the sweet potato until the last step. 

    3. Once the potatoes are tender, remove from the heat and leave to cool slightly so that you are able to handle them. Leave the oven on if you want to further roast the potatoes; see step 5. 

    4. Once cool, scoop out the potato 'flesh', leaving just the skin of the potato. Take the filling out of the fridge and stir the cooked sweet potato in, chopping up the pieces if they are too big. 

    5. You could now serve the sweet potato pockets by filling each potato skin with the filling and topping with extra spring onion and avocado, if using. Or if you would like your potato skin crisper, fill each potato skin with the filling and return to the oven for another 15-20 minutes or until the sweet potato skin is crispy. Remove from the oven and top with spring onion and avocado, if using. I've eaten these pockets both ways and I honestly like them both ways; it often comes down to how hungry you are!

    Serves / 8 
    Total Preparation time / just a few minutes as most of the prep is done during the cooking time. 
    Total Cooking time / 1 hour - 1 hour 20 minutes 

    x Premium Pilates 

    Wednesday, 27 January 2016

    FLOURLESS SWEET POTATO BROWNIES


    This recipe of the week is coming a little soon after the previous one, however I just had to share these delicious brownies! I brought a few into the studio yesterday and they were very well received! It was my first time experimenting with sweet potato as a brownie base and I was thoroughly pleased at the result. I have opted to make this recipe dairy free however you could use cows milk and I encourage you to if you are not intolerant or allergic. Whilst this recipe isn't uber sweet as the only natural sugar added is maple syrup and vanilla extract it is a very healthy alternative to the classic brownie. If you are a doubter of sweet potato with chocolate I dare you to try this, as the potato adds a level of creaminess that flour does not! Lastly, make sure you READ STEP 6 (the last step) very carefully or your brownies could not turn out properly! You have been warned! 


    INGREDIENTS

    • 500g sweet potato, peeled & cut into small (around 3cm), even chunks
    • 1 tablespoon extra virgin olive oil, for greasing 
    • 1/4 cup cacao
    • 1 teaspoon vanilla extract
    • pinch of sea salt
    • 1 teaspoon regular or gluten free baking powder
    • 2 eggs, preferably free-range, beaten
    • 1/2 cup desicated coconut
    • 3 tablespoons organic / natural maple syrup (not flavoured)
    • 1/2 cup almond meal
    • 1/4 cup unsweetened almond milk


    COOKING 

    1. Preheat a fan forced oven to 180 degrees celsius. 

    2. Bring a medium saucepan filled halfway with water to the boil over high heat, covered. Whilst the water is boiling, peel & cut the sweet potato. Once boiled, add the sweet potato and boil for around 12-13 minutes or until the potato is tender. Remove from the heat and drain under cold running water in a colander. 

    3. Whilst the potato is boiling, grease a baking tray with the oil and then line with baking paper. The baking tray I used was around 29 cm x 20 cm. 

    4.  Whilst the potato is boiling, pour all the remaining ingredients in a medium mixing bowl and stir well to combine. 

    5. Once the potato has been cooked and drained, mash well in a large mixing bowl. I don't mind there being a few chunky bits in my brownies, however if you do you can spend a few extra seconds mashing for a smoother consistency. Add the prepared batter from step 4 to the mashed potato and stir well to combine. 

    6. Pour the brownie batter into the prepared baking tray. It will be quite thick! Spread out the batter evenly with a wet spatula. Bake in the oven for 25 minutes or until the top of the brownie has just started to brown. This next part is SO IMPORTANT: remove the tray from the oven and leave the brownies to cool completely before cutting up into individual brownies. If you try to handle the brownies before they have completely cooled, they will fall apart. Remember that there is no flour holding the brownies together! The brownies need this cooling time to continue to cook! 

    Total Preparation & Cooking time / around 50 minutes plus cooling time!


    x Premium Pilates Studio